Saturday, November 6, 2010

A True Comedy of Errors....

I put wrenching into at least three categories. I'm sure there are more, but the ones that come to mind are (1) plumbing, like radiators and such (2) precision stuff, like valve adjustments, and (3) knuckle busters, like struts and other suspension issues. I knew it would be a knuckle buster going into it today. Start with a hammer and then get a bigger hammer.

The first strut installed was really pretty easy. The only tricky part was the brake hanger. I tried chiseling it off there, but that didn't work so well. Trying to break the metal off the side of the strut with the chisel seems like it would work, but that was unsuccessful. I found that starting a cut with the hack saw and then using the chisel as a cutting tool was the best method. That chisel cuts through the metal quite well. And the nice thing is that it left a downward pointed barb toward the end of the cut. That barb then went down into the eyelet on the new strut (the eyelet meant for the brake line). Once the strut was installed, I just set the old part on top of the new, the barb held it in place, and then followed with a hose clamp. The hose clamp was Joe's idea and it worked like a charm. Very solid mount. Great solution.

One fun trick I learned / used was that the bolts on the top of the strut, since they didn't line up just perfect with the holes in the strut housing of the car, had to be coaxed into place. I could see the bolts sort of start into the holes, but they wouldn't go. It was just slightly too tight of a fit. So, I attached the bottom of the strut and lowered the car down onto the tire and the force popped the top of the strut up through the holes. POP! All done. Then just put the nuts onto the posts.

The first side took me about two hours. Pretty good I thought. The way these things go, I was kind of thinking I would burn through the second in maybe half the time. "Sit back, relax, enjoy this, Douglas," I thought to myself, "You've got this job under hand."
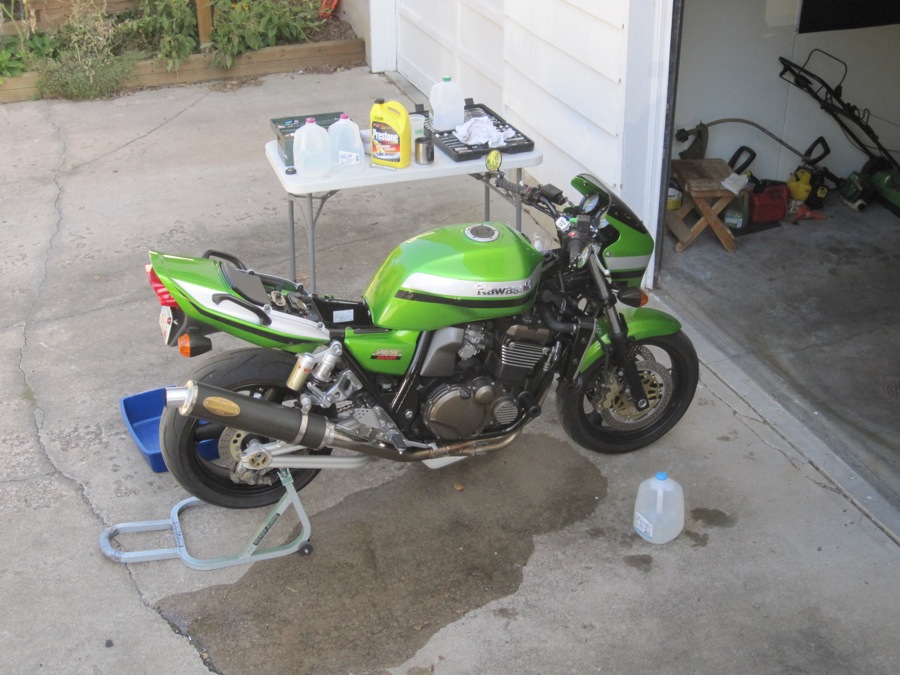
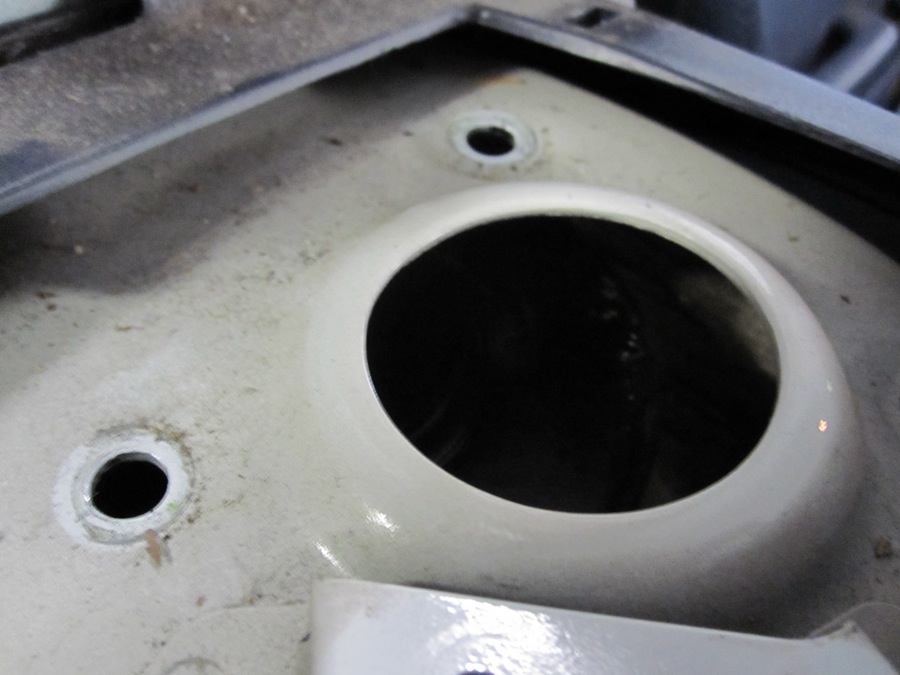
Well, wouldn't you know it. I sort of suspected maybe I got lucky on the first side. I didn't use a torch or anything and I was able to break those two big bottom bolts free. Just a pipe on the end of a regular 3/8 inch drive ratchet did the trick. But, on the second side, I actually broke the ratchet. It just jammed up. I guess the internals get jammed and it's dead after that. I tried a second ratchet and actually broke the nub off the thing where the socket attaches. Okay....so this isn't going well. I read in some forums and I was told by some people that I might need to use a torch on those big bolts to get them loose. Oh well, to be expected. I don't have a torch, so I ran to Walmart on the ZRX. Bought a new ratchet and a torch and some of the spray lube for loosening rusty parts. In this next pic, you can see one of the two big bolts to which I am referring. Actually, this is a pic of the side I was having trouble with.

Torch, torch, torch. Push, push, push. Bolt isn't budging. Spray some of the stuff on. Bang with hammer. Torch, torch, torch. POW! There's goes my third ratchet. Broken. That's okay......that wasn't the new one I bought. We're still good. One more left. No biggy. I AM LITERALLY RATIONING RATCHETS AT THIS POINT BECAUSE I AM BREAKING THEM SO PREDICTABLY. Torch, torch, torch. Hammer, hammer, hammer. Time for my ace in the hole.....my new ratchet. I bent a pipe I was using as a breaker bar, so I scavenged a HUGE pipe off my front work stand. New ratchet, enormous breaker bar. POP!!!! Fourth broken ratchet. Fuck!
Hey wait a minute..... I turned the car around to do this side. I was pushing on the other side, that means I should be.........pulling on this side. Jesus H Christ, I have been tightening this whole time. It took me FOUR ratchets to realize....oh yeah, righty tighty, lefty loosey. Below is a pic of the four broken ratchets....casualties of an idiot mind....

So I'm out of ratchets and down to my box wrenches at this point. I torch and low and behold....with a LOT of whacking with the hammer on the open end of the box wrench I was able to get the top bolt free. Luckily, I hadn't had much access to the bottom bolt, so I didn't get a chance to tighten it beyond belief like i had the top one. Also, another little bit of silver lining here is that at least I broke the ratchets instead of breaking a bolt or rounding the bolt off. No parts on the car itself were actually damaged in this tsunami of stupidity. THAT I consider to be QUITE A BLESSING and is what allowed me to retain my sense of humor about the whole ordeal.
Okay. So, we're cooking now. I use my top strut mount bolts trick and that works like a charm. I attach the brake line, sway bar, the two big bolts. And then back on with the wheel. I give the lug nuts one last good tug and the whole assembly drops like something broke. OH SHIT! This can't be good.
Of course it didn't take me long to realize I had not actually bolted the strut in at the top. I had gotten the posts through the holes and then moved on to the bottom because that's the order the book suggests. Only I never went back and actually screwed the top in.
So back off with the wheel. Only now I can't find the nut and the bolt that secure the top of the strut. They are NO WHERE to be found. In fact, I can't even remember taking the new ones out of the top of the strut. That's when I hear the faint laughter. I inspect the strut housing and discover that I left them IN the new strut. I cannot believe this! I immediately worry that I am going to have to COMPLETELY remove the new strut ENTIRELY. Luckily.....by the grace of JEBUS almighty, I was able to just pull down on the whole assembly and remove the two nuts and the one bolt. It was a tight fight, but I was able to jam my arm and hands up there to retrieve them. And low.....the offending bolts....

And believe it or not, I was able to actually tighten the top of the strut down this time. Impressive...

Now, aside from breaking FOUR ratchets because I didn't remember righty tighty lefty loosey, and aside from completely failing to bolt in the top of one of the struts, and aside from leaving vital hardware attached to the new strut and then having to retrieve said hardware like I was birthing a breached baby calf.....I would say today was a huge success. The job took me about 6 hours and a few busted knuckles, but I saved myself a good five or six hundred bucks. The pair of struts only cost me $190 SHIPPED off Ebay and I had the job priced out at two shops between seven and eight hundred dollars. Well worth it in my opinion.
Took the car out for a test drive tonight and the ride is much improved and way quieter. The front struts don't look bad, but they've got 165k miles on them as well. So, I'll probably be doing those soon enough. Thanks to Joe for his idea on how to attach the brake line without opening the line.

Monday, October 25, 2010

HWY 221 ZRXOA Fall Rally Eureka Springs (09/24/10)

Following Neal back to Eureka Springs from Brushy's Corner after Roland's off.

Push Mountain Rd. ZRXOA Fall Rally Eureka Springs (09/23/10)

Push Mountain Rod. from HWY14 heading north, running it to just over the crest of the hill.

Monday, October 18, 2010

SUFJAN STEVENS


If you see one show this year, I can almost bet it will NOT be this one. You'll be missing something though. I had a coworker ask me to go to this so I checked his older stuff out on the net. Had plenty of banjo in it, so I thought, "What the heck for $35." All his stuff last night was new - and in Sufjan's words and my opinion - experimental. I knew almost nothing that was played. However, I can say that this was probably the best live show I have ever attended in my life. I had made this decision about three songs into the evening. There just seemed to be a tremendous energy in the music. At times, I would think, why do I like this so much? What are they doing up there that I dig so dang much? And it wasn't the banjo, because he put that down after this first song and never touched it again the rest of the night. What a fantastic show. Just amazing.

Sunday, October 10, 2010

New Radiator Installed Successfully.


I received the new radiator in the mail Monday. Installed it Wednesday with no real problems. I put straight water in there, though Jody very wisely told me that I should be careful just not to tell anyone that. Thanks for the tip, Jody. Anywho, I rode the bike to work Friday and maybe put a total of 35 to 40 miles on the bike like that.
So today I took the time to flush the system and put the proper coolant and water mix in there. Figured I would share the process. I was able to pull the tank BACK about 6 to 10 inches and didn't even need to pull it completely off the bike....that way I was able to use the fuel source as a fuel source without rigging something up. No one has ever mentioned this, but it works fine as long as you take the fuel drain line off the back of the tank. That's all you need to disconnect. And with the bike on the rear stand, you can turn the handle bars to the left, and you have plenty of room to pour from a gallon jug into a funnel in the filler neck.
PROCESS. I removed the rad cap, started the bike, and then removed the drain plug at the bottom. Back to the top and I started pouring water in as water drained from the bottom. Turned the bike off when the gallon jug got low. Rushed down and replaced the plug. Topped the rad back off with more water. Started the bike again. Ran the bike until water in filler neck got hot. Then pulled the plug again. Filled from filler neck as water drained from the bottom. (I was careful to never let the water drain out completely, which prevented me from having to bleed from the water pump each and every time.) I did several slightly different variations of this and used a total of maybe 6 or 7 gallons of water until the water ran good and clean with minimal particulates left over from the Alumaseal that I put in there at the rally. It was interesting how when I would pull the plug, hot water would be draining at first but by the time I was near the bottom of the jug, cold water would be coming out at the bottom. Anyway..... I did have the fleeting thought....I hope these temp changes in water don't crack my head in like 12 different places. I'm not really smart enough to know if that could happen, but it just flashed in my head as an epic thread on the OA.
When I finally put the coolant mix in there, I let about 6 to 8 cups drain straight through in hopes that that would displace any straight water that might have been left in there. I did clean and refill the reservoir bottle as well. And of course I bled air from the water pump and thermostat housings. And I plan to check my ratio mix for freeze level with a tester later in the week. I'll be road testing the bike this week to make sure all is fine. But it seems to be a good fix thus far.

Monday, October 4, 2010

Look What Daddy Got....

It's one thing when you get a plain brown package on your door step and you think....."Oh, sweet, my radiator came."

And then it's a whole other thing when you carefully cut that boring brown box open and you realize....I just entered the world of aftermarket parts, aka the mod world. That red box is downright impressive.

I pulled the rad out completely and it looks real good. Appears to be straight; I did the Jody-laying-it-on-a-flat-surface test.

Pics of the replacement to follow, as well as other updates.

Sunday, September 19, 2010

Went Hiking and almost stepped on a THIS.....

So I set out hiking yesterday. I hit Weston Bend State Park, which overlooks the Missouri River. The trail I chose evidently hadn't been walked in a few days because I fought spider webs across the trail the whole way. I hate that. I had to use a branch held out in front of me to cut down the webs so I wouldn't get tangled up every few feet. Anywho, on my way back DOWN the trail and moving at probably a slightly quicker clip, I stopped well in advance of these copperheads. They had crawled out and were lying dead square in the middle of the trail. I proceeded around them with extreme caution and only took the picture after passing safely.

I also saw this creature, which wouldn't stop moving long enough for me to take a decent pic.

MORE TO THE STORY.....


After I obtained my urban tapestry, about a week later, I passed the scene of the first acquisition, and I was pleasantly surprised to find a second tag. This time it was on the back of the mattress. So out comes the carpet knife and now I have the companion piece of artwork.

But then I started seeing this "Olivera" tag all over midtown. So I took a few pictures. Actually, most of these other tag pics were taken within a stones throw of Steve's house. (If you have to ask who Steve is, you don't read the blog often enough.)


This next pic, which is poor resolution because it was taken with a cell phone, was taken in the bathroom at Wesport Coffee House where I play Scrabble. The presence of the tag caught me by surprise, but the symbols below it were of even more significance. The "$O$" is the name of the Die Antwoord album that was recently released - their debut album. Most of you will have never heard of Die Antwoord. However, Die Antwoord is responsible for the quote on the pic at the top of the Blog: "You picked the wrong Ninjas to fuck with." And low we have come full circle. Did I just BLOW YOUR MIND???


Wednesday, September 15, 2010

Ken Block - Gymkhana Part 3

Wow, just wow!  Go to YouTube and watch in hi-def if possible.

Sunday, September 12, 2010

Speaking of the People's Republic.....


As I was driving to and from Tennessee recently, I had a concern for my safety. Over the 800 miles, there are plenty of high speed bumps....plenty of places to loose the tail end of the Corobra because of the crapped out struts in the rear. It really is pretty bad. I haven't had any scares or close calls, but I can sometimes feel the back of the car wanting to go its own way. And the thought occurred to me that it would be pretty bad to have an accident and injure myself because I wasn't willing to spend the bucks to fix the ol' girl. What would make it worse is that I have the money; I'm just reluctant to spend the seven or eight hundred dollars to get it done.

So, I found out that one option is to replace the whole strut and spring assembly. They're called Quick Struts and they can be had on Ebay for quite a fair price. I can get the set for the rear for under $200 shipped. Anyone see anything wrong with this? I imagine this would be just a few bolts and voila! The quick struts for that price aren't Monroe or anything name brand, but the sellers have good ratings and anything has to be better than the crapped out struts I have in there. And on top of everything else, I think it would be fun to fix this. Get a little wrenching in in my kick-ass conditioned garage space.

Saturday, September 11, 2010

Sunday, August 15, 2010

"I told you - damn it - ENOUGH with that infernal racket!"


Since I moved to my new place, I take walks in the evening as often as I can. Typically I'm out for an about an hour. It's a very cool neighborhood. Anywho, I should have been "blogging" all summer about all the cool stuff I've seen. For example, I came across this scene tonight.
Shameless repost below:

Sunday, August 8, 2010

wwwelp…..I joined a gang.


Faced with the void after recent life events, I turned to Craig’s List on a hot and lonely summer weekend. In the “Community Groups” section along with blue hairs looking for a friendly game of rummy, I found an ad with the title, “Let’s do some crime.” It seemed clever, funny, fresh, and oh so enticing to an impressionable young man of 36 years. It started out as a friendly get together, a few forties at a block party in the worst part of town. The next morning, I wake up wearing a wife beater t-shirt sporting a fresh tattoo (of poor quality, might I add) and a nickname; they chose “Sling Blade” evidently due to my southern accent. But the kicker is they’re actually a really cool group of guys. They get me. I mean they really get me. They’re as fed up with the rat race as I am. Not only do they not ask me about my “bucket list”, but I haven’t found anyone in the gang who even knows what that is. 401K? Please. These guys – nay WE are living in the moment. Health insurance? Try life insurance. Heck, most of these guys have never even met someone as old as me, much less expect to reach my age. Yep, I’ve found my group of fellas, my homies, my new family.

Actually, the real story behind this new garage adornment (what I have dubbed an Urban Tapestry) is that I saw this painted on a curb-discarded box spring in midtown. I passed it and admired it for a few days and then it occurred to me that I could simply cut the material off the box spring. And so I did. Brought it home and hung it in my garage. After hanging it, it dawned on me that the top part reads “OLIVERA”…perhaps a last name. While the bottom is still a mystery, it kind of looks like “PSTE”. Any help in deciphering would be much appreciated.

Saturday, July 17, 2010

A tad dramatic...

Perhaps, but it does sum up how I feel right now. Even through the pain I feel like there is improvement in my range of motion and less "tightness" in my joint which was being caused by the thickened bursa. Might be too early to get my hopes up but I am trying to stay positive. The fact that I won't be immobilized for 6 weeks has gotten me excited enough to start looking towards the next Roadeo!

Monday, July 12, 2010

Nothing Really Mattress


You know, I've known for a while now that I like this new neighborhood that I'm living in. But after seeing this, well, this is home. I saw this out on my walk last night. Had to go back tonight with a camera for documentation.

Tuesday, June 22, 2010

Monday, May 3, 2010

It's Official....


....Best Garage Ever. It's so nice I sweep pretty much every time I work on anything in there. As for the need to post a new pic, well that would be to show off the new Kawasaki flag I purchased on fleabay. I have a second one I'm gonna hang on the left side. It's red lettering on black background with similar Kaw theme.

And in an effort to make this a completely random post, I decided to post pics of a house that I passed on my way to work this morning. It's on a side street within walking distance of my house. So when I got home this evening just before dark, I went out on foot and took a few "recky" shots as Chuck would say. Not sure what this place might have been before it was residential. Cool as all get out though. I think I could see a big tree growing inside, although I'm pretty sure it's a residence.


Sunday, May 2, 2010

Route 2. Hot Springs, Roan Mt, and the BRP

This is a route that utilizes the corridor of the western Piedmont with which I am actually quite familiar. I think Roan Mountain and Linville Falls are a couple of the most beautiful places in the region and I wanted to include those on a ride. This is the suggested 330 mile route.
From Maggie Valley, we get to 209 and head east to Hot Springs. That is a GREAT stretch of road. Lots of hairpins. Then we head on to Roan Mountain where we can get off the bikes and trek to the top of a "bald" to see the view. The short "hike" is optional. On to Banner Elk and Jonas Ridge and we take HWY181 towards Morganton. Everyone has said that 181 is a great road and I do remember running it often (many years ago) in a car. Turn and head back north up HWY181 and stop off at Linville Falls, which is another very nice scenic spot. Another stretch of the legs to see the beautiful waterfall. Short hike....very easy. Here's where it might get tricky. We can actually pick up the Blue Ridge Parkway right there at Linville Falls and it will meander (and I do mean meander) all the way back to Maggie Valley via Asheville. I think this could be a bit on the naive side because I think I remember someone telling me that the BRP moves along quite slowly. But if we got tired of it, we could hop on a main road and jettison back to Maggie in no time. However, I've been on parts of the BRP and it is quite beautiful and I think it would be fun to take in as much of it as we can.

Here's a pic of the route and a LINK to the Google page.

I40 is OPEN!!!!


I know this may not seem like a big deal, but it is. This means we will be able to take the interstate pretty much straight into Maggie Valley, NC. No dodgin' opossum at midnight on back country roads while trailering our precious cargo.

ALSO, another HUGE benefit is that I40 is a connecting route to a ton of good roads in the area. So while we won't be on it much, it connects a lot of awesome destinations that may have been difficult to access via gravel forest roads.

Downside? The potential for being on the receiving end of one of those rock slides that closed I40 to begin with.

Saturday, May 1, 2010

Route 1. Highlands and Lake Toxaway.

Hey all. I started a thread on the OA and have been asking for route suggestions for the Maggie Valley Roadeo. Here's one that I've mapped out on the Google. I got this one from "Flying Dave" off the board.
From Maggie, pick up the BRP (Blue Ridge Parkway) to 23. Head down to Sylva. Take 107 out to Tuckaseegee. Pick up 281 to Lake Toxaway. 64 over to Highlands and up to Tilley Creek road back to Cullowhee. Ride back to Maggie.


This appears to be about a 155 mile route, so we could make it a part of longer ride or whatever. Here's the Google link if interested.
Also, if you want to see the thread on the OA, follow this link.
More routes to follow and feel free to add routes of your own.

Wednesday, April 28, 2010

The Good, the Bad and the Ugly...

I just couldn't stand not knowing what kind of shape the bike was in so I went up to the storage yard to take a look. I think several factors played into my advantage that kept damage to a minimum. Wreck happened at low speeds and we actually ended up in the entrance to a parking lot which has some upward slope to it which took some vertical out of the drop.

Front rim seems to have taken the worst of it as it must have "dug in" on the incline. Bottom of fork leg is scuffed.


2 of the 3 places the front fairing is scuffed. Bottom of radiator shroud is scuffed. Custom blinker is scuffed.


3 of 3 places the front fairing is scuffed.


Can is scuffed.


Bar end and lever on right side.


Left rearset looks bent and heelplate was sheared off.


Rear brake lever mangles and possibly the rearset bent.


The savior!


All in all I feel I got pretty lucky considering I was physically struck by the truck. Hopefully I can get the rear sets sorted before the rally and I'll deal with the other items afterwords.

Tuesday, April 27, 2010

Man Down, Man Down!

Got sideswiped by a pickup turning left off of a light. I was behind him as the light turned green and pulled into the right lane as soon as we cleared the intersection I pulled into the right lane. He decided he needed Taco Bueno and cut on me hard. Honestly, it happened so fast I didn't have a chance. I didn't even get a chance to check the bke but obviously it's not going on the trip. Doctor coming in, will update later.

Edited Account:

Got taken out today by a pickup truck at 11th and Delaware on the way home from work on my motorcycle. The truck in front of me, and myself, had just turned left onto 11th Street off of a redlight on Delaware coming south out of the TU campus. As soon as we cleared the intersection I moved into the right lane as I typically don't like to be behind pickups for sight-line issues. As I pulled next to him, my guess is that he decided to cut into one of the fast-food restaurants on the south side of the road as he cut hard from the left lane and tried to dart in the parking lot on the right, taking me out in the process. I had absolutely no time to react and was down before I could even begin to think about taking evasive maneuvers. By the time I got up and sorted myself out, someone had already called the ambulance and although I really didn't want to go to the hospital, Cindy insisted so I took a ride to the ER. By the time I was strapped into the ambulance, and the initial shock of the accident was wearing off, my shoulder was really starting to hurt and I my thoughts were that I might have broken/fractured my collar bone. X-Rays in the ER turned up negative so after 3.5 hrs in the ER I was released.

I never really got a chance to survey the bike at the scene as it was down on its right side and too close to the truck to pick up. I have no idea how bad the damage is but my guess is rashed right fairing, bent/broken right peg and bars and trashed exhaust can. Hopefully it is still rideable and I am going to try and retrieve it from the wrecker yard today. All in all I feel I came out of the incident in pretty good shape and hope to take a lesson from all of this. I want to be more upset with myself for not being able to avoid the situation but in running through the scenario over and over in my head, it was completely out of my control. The guy couldn't have done a better job of timing the sideswipe even if he was doing it intentionally. In any case, I'll keep you guys posted and thanks to everyone for the calls and well-wishes.

Sunday, April 25, 2010

New Bars

Finally got around to installing my "new" bars on the Fizzy and am looking forward to seeing how they ride tomorrow. On Friday, I messed around with quite a few different mounting positions as I had some lower bar mounts and 3 different sets of bars laying around. It quickly became obvious that I didn't really want to go lower so after thinking on it for a couple of days, I mounted the flat drag bars after cutting 1/2" off of each end. Sitting on the bike it seems much more comfortable now with the bars at a more natural position. See comparison below.

For you dog lovers...

This is what I envision going through Milo and Bodie's heads when Dick or Brett comes over...

Sunday, April 18, 2010

Bulldogged Akra

Well, I have to say this was a mod that went exceptionally well considering how little info I had on what was involved. I knew I wanted approximately 4 inches taken out of the can but that was about it. The process was fairly straight-forward with disassembly requiring no more than drilling the rivets out. Cutting the carbon fiber was so much easier than I thought it was going to be and was accomplished with a hacksaw with a new blade. While I had the can off, I hit the pipe with my buffing wheel and voila, I solved my pipe color issue as well! I took the rear pegs off and used a ZRX MikiMoto pipe hanger and it worked out just right. The aftermarket pipe hangers for the Fizzy come perpendicular off of the frame and don't really look good where the MikiMoto has a nice rear sweep that works well with the lines of the bike. The only minor drawbacks to the entire mod are the strap marks on the carbon fiber wrap from the stock mounting location. Hopefully the sun will take care of that over time. Thanks to Deek for pitching in and helping!